|
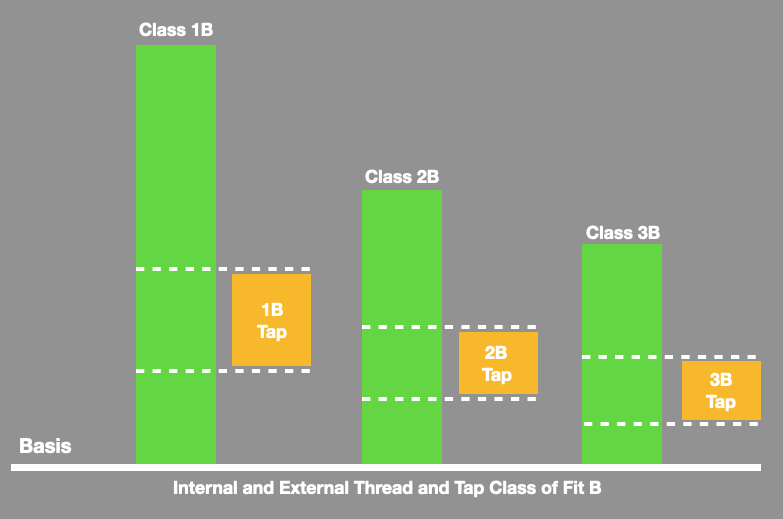
The tolerance of the tap should be manufactured as close as possible to the finished internal thread tolerance.
This practice ensures that the threads produced will comply to the gage tolerances providing that the working conditions such as machine, chucking tools, and workpiece match the application. H LImits Explained
H limits are used to properly size a tap for the threaded hole to be produced. They are selected based upon the tolerance required for the part. These tolerances are defined by the symbols class 1B, 2B, or 3B.
The sizes of a 2B and a 3B tap are different. The 2B tap is smaller in size. It has an outside diameter of 0860 inches. The 3B tap is larger by .0130 inches, making its outside diameter .0990 inches. As the sizes progress up the tap scale, it increases in size by .0130 inches in outside diameter. Other types of taps, such as hand or fractional taps, increase in increments of 1/4 of an inch and referenced not as a number, but the size in inches
Selecting a H Limit on a tap
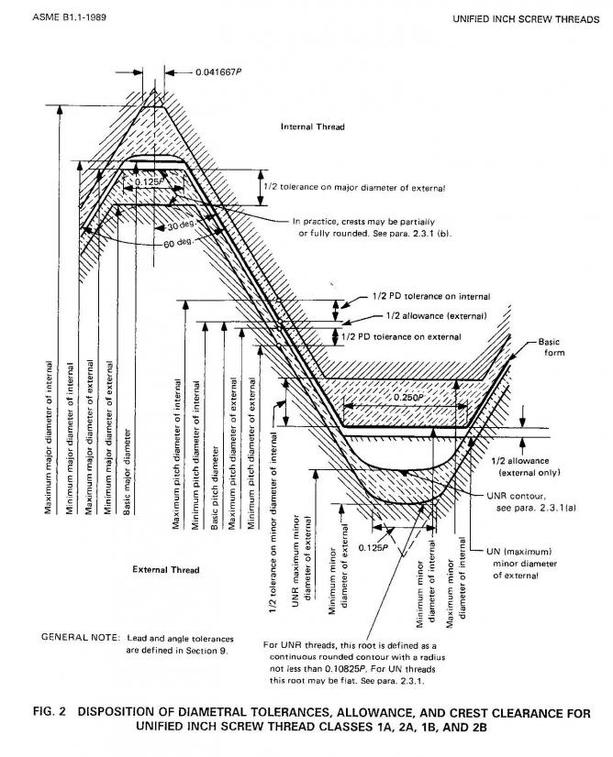
Once the class of thread and part tolerance has been defined, an H limit is selected to produce a thread that is within the minimum and maximum limits for that class if fit. These limits are the same as the Go and Not Go thread plug gage dimensions.
The goal is to select a tap with an H-limit that is near the middle of the part tolerance. For instance, if the total tolerance was .005", the tap should be approximately .0025" larger than the minimum limit of the part and .0025" smaller than the maximum. In order to handle the widest variety of tapping conditions, the "40% rule" is commonly applied. Using this rule, the tap is selected at 40% of the part tolerance. For instance, if the part tolerance is .005", multiplying .005" by 0.40 equals .002". Thus, the tap would be .002" larger than the minimum limit of the part or Go thread gage. With the position of the tap in relationship to the part tolerance established, the selection of an H limit number, such as H3, H4, H5, etc. is possible. H limits are a sequence of size "steps" in .0005" increments beginning at the minimum size limit of the part, starting with H1. In other words, an H1 limit is one .0005" increment larger than the minimum limit or Go gage, an H2 is two .0005" increments (or .001) larger than the minimum limit, an H3 is three .0005" increments (or .0015") and so on. In the example above, a tap that is .002" larger than minimum limit, is four .0005" increments larger, or an H4. This would be the tap H limit recommendation for this tolerance.
Taps are general marked with the appropriate tolerance class for their intended use. The U.S. GH thread class numbers are not marked on the tap.
Tolerances for the various GH numbers are shown in the chart below Classification for the tolerance 1B can be provided upon request. Taps for cast iron and titanium tapping are designed one GH class higher to provide better tool life.
2 Comments
|
Technical Support BlogAt Next Generation Tool we often run into many of the same technical questions from different customers. This section should answer many of your most common questions.
We set up this special blog for the most commonly asked questions and machinist data tables for your easy reference. If you've got a question that's not answered here, then just send us a quick note via email or reach one of us on our CONTACTS page here on the website. AuthorshipOur technical section is written by several different people. Sometimes, it's from our team here at Next Generation Tooling & at other times it's by one of the innovative manufacturer's we represent in California and Nevada. Archives
July 2024
Categories
All
|
||||||||||||||||||||||||||||||||||||||||||||||||||||||||||||||||||||||||||||||||||||||||||||||||||||||||||||||||||||||||||||||||||||||||||||||||||||||||||||||||
About
|
© 2024 Next Generation Tooling, LLC.
All Rights Reserved Created by Rapid Production Marketing
|


 RSS Feed
